Usage
Reports let you combine multiple Dashboard widgets to create a document thatcan display certain information contained within a Graylog system in an organized formatfor specific purposes.
Note
Reports are based on Dashboard widgets, so please ensure you understand Dashboards before you get started.
Creating Reports
You can create a report on the “Enterprise/Reports” page in the web interface.
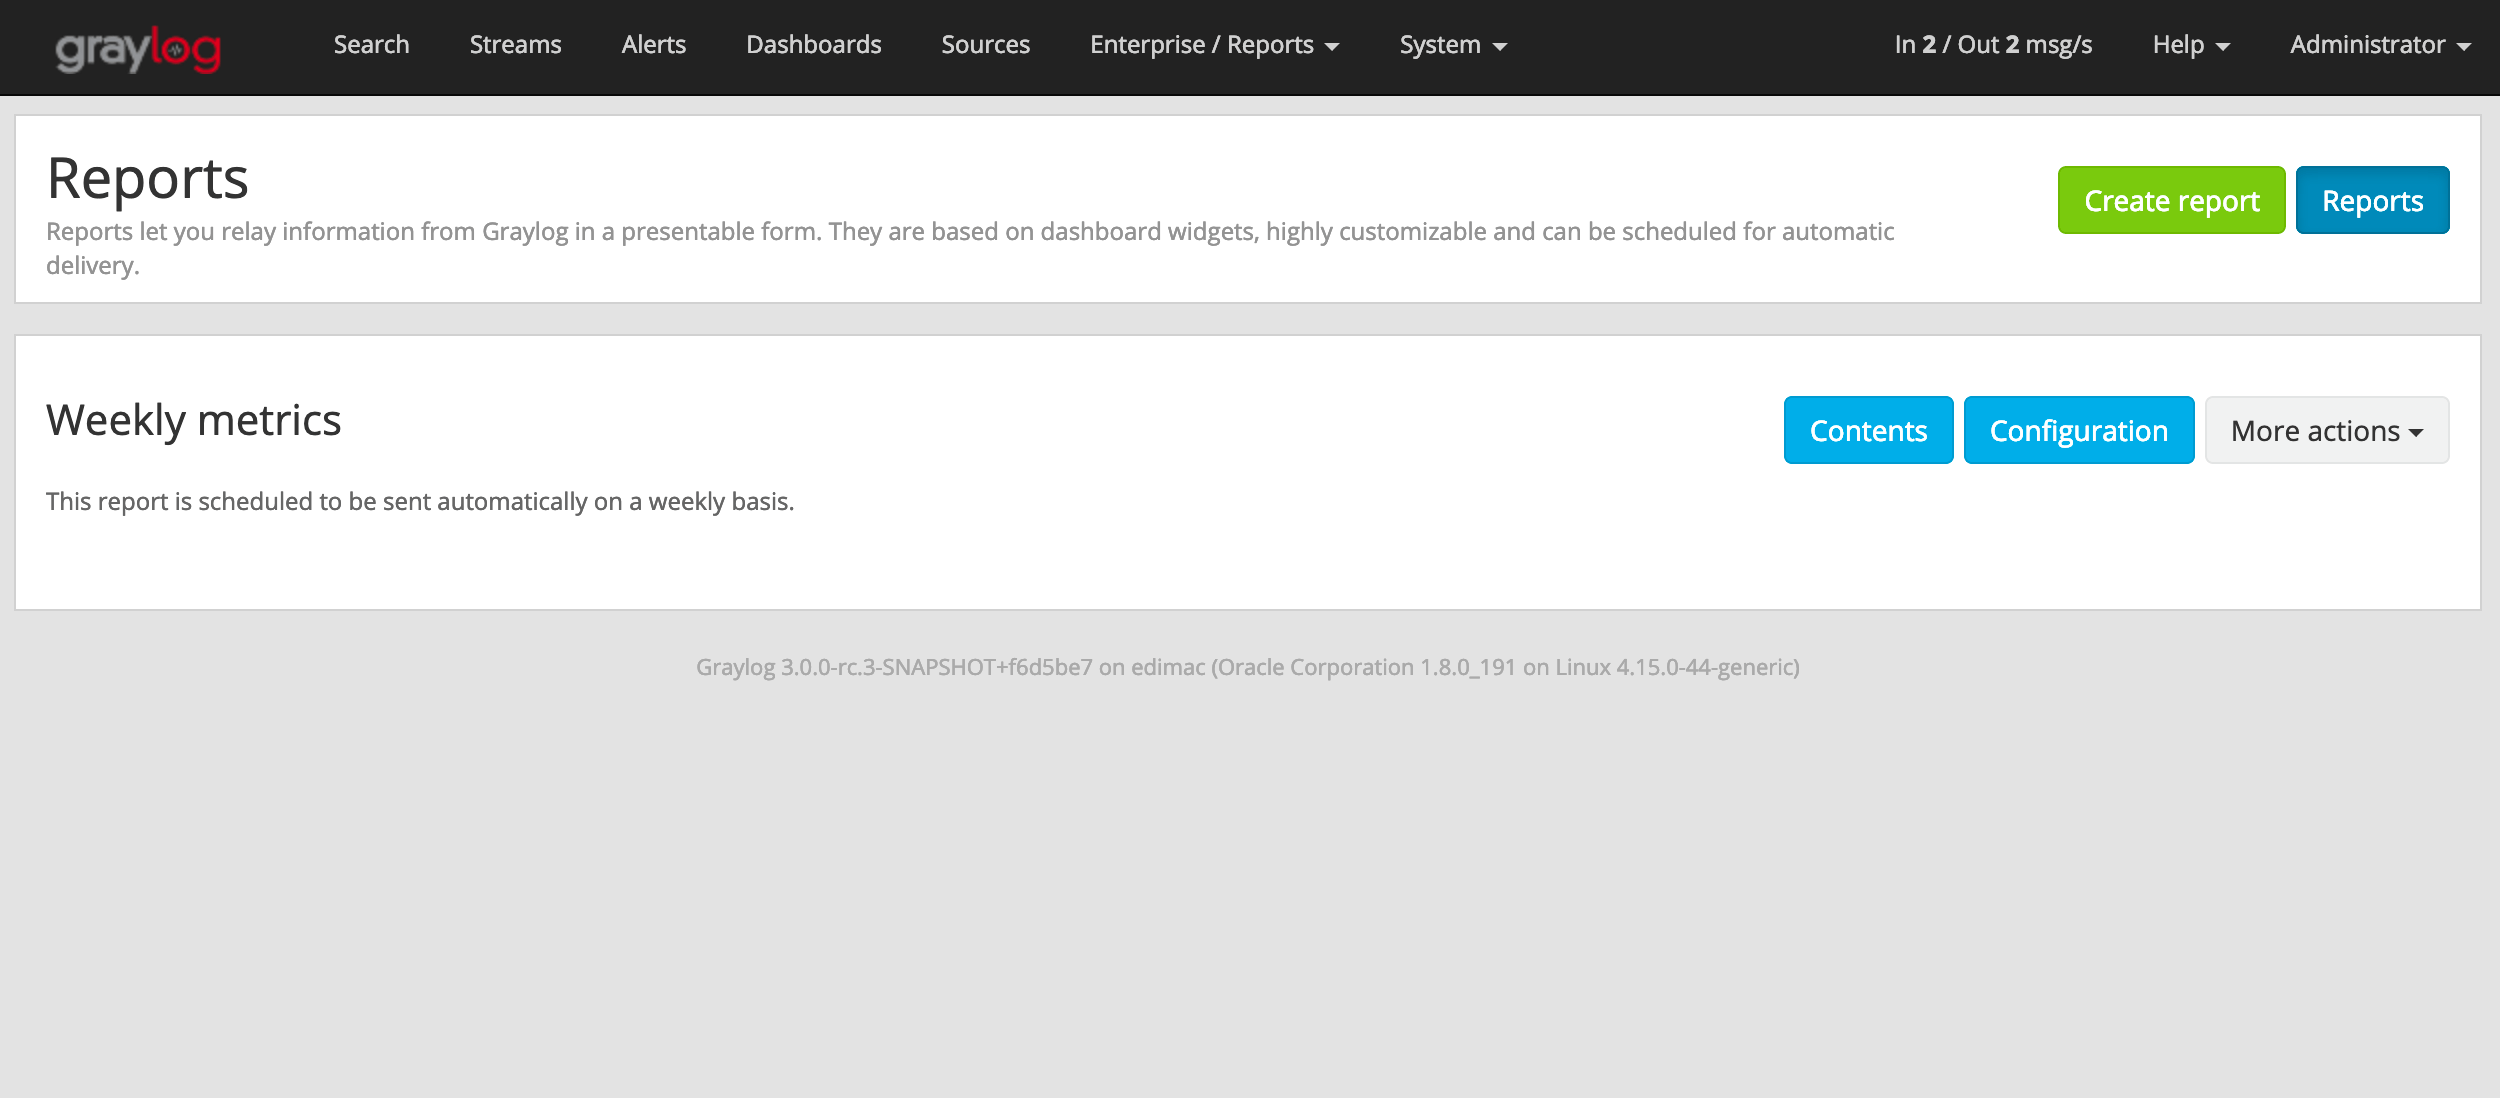
Click on the “Create Report” button to get started. That page contains twodifferent sections:
Contents You can use the form to configure the report’s cover page, ashort description, and select the widgets that will be part of the report.
Summary This information will usually appear on your right and will followyou as you scroll through the page. It displays a summary of the data includedin the report.

Once you are satisfied with the content that will make part of your report, clickon “Create report” to store that configuration in the database.
You can change the selected contents of a report any time by going to the“Enterprise/Reports” page and clicking on the “Contents” button for the reportyou wish to modify.
Configure Reports
The Report Configuration page provides options to schedule the report fordelivery and also to configure the layout of the report.
Go to the “Enterprise/Reports” page and click on “Configuration” to open theReport Configuration page.

Scheduling
Warning
Please ensure the email configuration inyour Graylog configuration file is working before you enable report scheduling.
Note
Scheduling Reports will use resources in the background on both yourGraylog and ES cluster. To avoid performance issues, make sure to allocateenough resources for your setup and also disable scheduling of Reports youdon’t need to be sent automatically.
In the Scheduling section you can configure how often the report will be sent. Itis possible to send reports on a daily, weekly or monthly basis.
Here you can also add a subject and body to the email that will contain the reportand select Graylog users or external email addresses that should receive the reportas email.
Once you update the information, make sure to click on “Update scheduling” to saveyour changes.
Layout
Much like in a Dashboard, you can drag and drop widgets on the virtual sheet ofpaper to select the orders the widgets should go in the report. Rearrangingwidgets will save the change in the layout automatically.
Please note that the cover page will always be the first page of the report, andthe next page will start with the report description followed by all widgets inthe configured order.
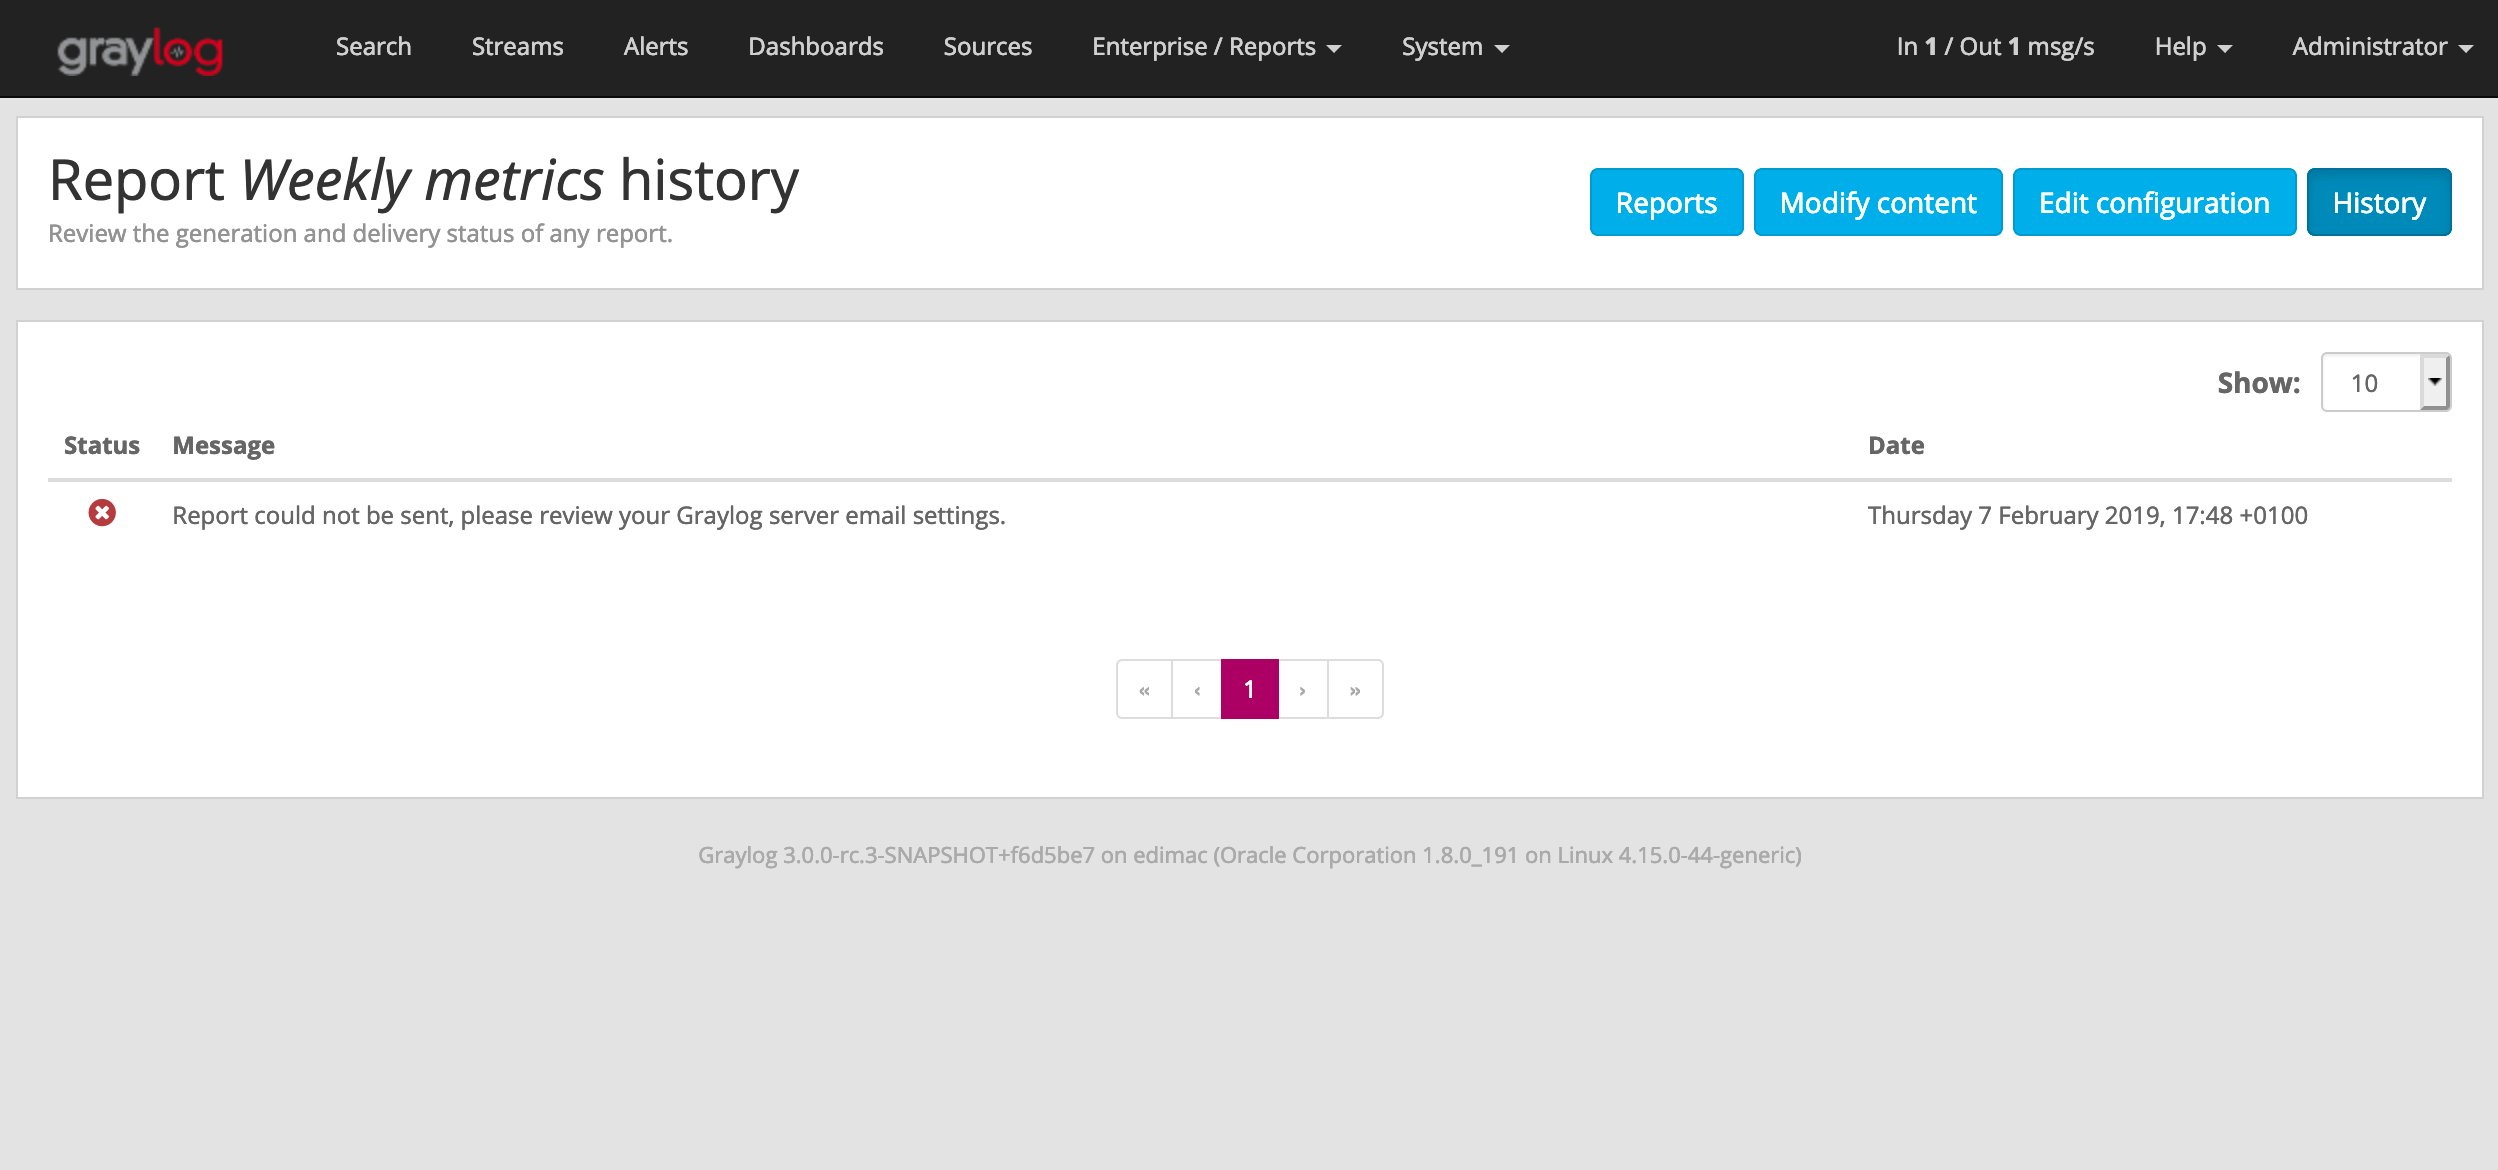
History
As the background generation of reports may fail, the Report History page can helpyou discover if there were any errors while generating and sending a report inthe background.
To open the Report history page for a report, click on the “More actions” buttonfor that report, and select “Report history”.
Generating Report On Demand
Download manually
You can generate and download a report manually from the web interface. To do so,go to the “Enterprise/Reports” page, click on the “More actions” button for thereport you want to download, and select “Download report now”.
Please take into account that the report generation may take a while.
Send report as email manually
In addition to downloading a report on demand, you may also generate and sendthe report at any time by clicking on “More actions” and “Send report now” onthe “Enterprise/Reports” page.